Displaying the contents of a touch menu on a second screen
With FrontFace, you can create an interactive touch menu where the user clicks on buttons and can view the corresponding content.
Sometimes there is a requirement to display the content on a separate, second screen. One screen (the touchscreen) is then used to control and navigate the content, while the second screen (e.g., a large screen or projector) is used to display the actual content.
This scenario can be implemented with the help of the Remote Control Plugin and is explained step by step here.
Installing the Plugin
- In the FrontFace Assistant, under "Player," activate the option "Show Advanced Player Settings...".
- Click the "+" symbol next to "Services".

- Click "Install a new service plugin".
- Select the plugin's .FFAPX file to install the Remote Control Plugin.
Plugin Settings
- Select "Use all Playlists" in the settings dialog.
- Click the "Generate Init Service.cmd" button and then enter the name of the local user account (on the player PC).
This will create a batch file that you must run on the player PC (!) with admin privileges to install the service.
If you also want to test the function in the player preview on your workstation PC, create an additional batch file with your local user account and run it on your workstation PC, also with admin privileges.
Create Screens
- Add the appropriate screens to your player in the FrontFace Assistant under "Player".
Create the Touch Menu
- Create a touch menu with buttons (only the buttons, without pages or content).
Creating Playlists
- Create playlists containing the desired button content (for example, a playlist with an image, a playlist with a video, or a playlist with a PDF file).
- Name the playlists so that the content is recognizable by the title.
- Additionally, create a playlist to be displayed on the second screen when no content is accessed via the touch menu (default playlist).
Creating Actions
- Head back to the touch menu.
- Open the button's settings dialog.
- Activate "Expert Mode".
- Click the "Actions" tab.
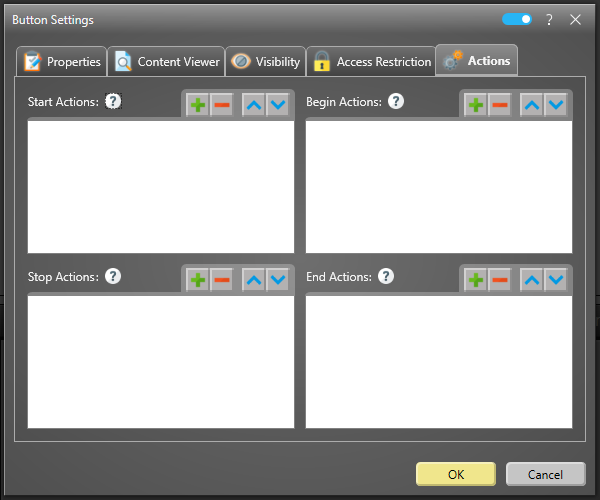
- Under "Start Actions", click the "+" button.
- Select "Remote Control Command" and click OK.
- Under "Command to Execute," select "Start Playlist".
- Under "Playlist", select your previously created playlist from the list.
- Under "Screen", enter the screen number.
- Click OK.
Repeat these steps for all buttons and assign the launch of the respective playlist as the "Remote Control Command".
Scheduling
- Switch to "Scheduling".
- Assign the touch menu to the interactive screen and the default playlist to the other screen which serves as content viewer.
Publish
- Switch to "Publish" and click the "Publish" button.
Preview
If you want to test the preview functionality in the FrontFace Assistant, you can use the "Player Preview". In the "Player" section of the FrontFace Assistant, you will find a preview button for each player in the list of players.
To do this, you must first run the batch file on your workstation PC (see the "Plugin Settings" section).
Functionality and Advanced Options
If the user clicks one of the buttons on screen 1, the corresponding playlist is launched and displayed on screen 2. Clicking a different button will then display the other playlist.
It automatically scrolls through multi-page playlists or content.
If you also want to give users the option to close the content again, you can create a corresponding button in the toolbar:
- Open the touch menu settings dialog.
- Under "Menu Layout", click "Toolbar".
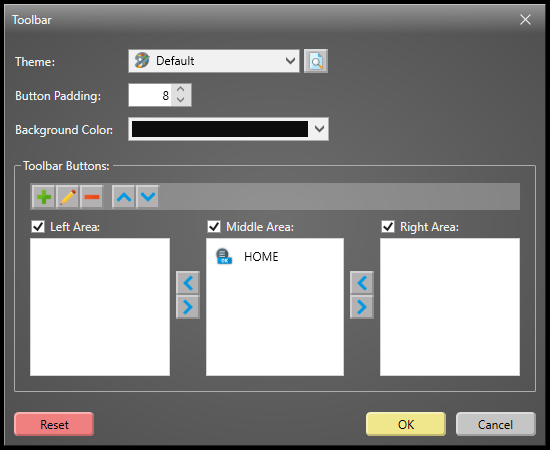
- Under "Toolbar Buttons", click the "+" symbol and select "Button".
- Add a caption, for example, "Close".
- Under "Actions to Execute", click the "+" symbol.
- Select "Remote Control Command" and click OK.
- Under "Command to Execute", select "Stop Playlist".